-
 Bangor Marina Bangor, Northern Ireland
 -
 Conwy Marina Conwy, North Wales, Wales
 -
 Deacons Marina River Hamble, Southampton, England
 -
 East Cowes Marina East Cowes, Isle of Wight, England
 -
 Haslar Marina Haslar, Portsmouth Harbour, England
 -
 Penarth Marina Penarth, Cardiff, Wales
 -
 Portishead Marina Portishead, Bristol, England
 -
 Portland Marina Portland, Dorset, England
 -
 Rhu Marina Rhu, Firth of Clyde, Scotland
 -
 Royal Quays Marina Royal Quays, North Shields, England
 -
 Weymouth Marina Weymouth, Dorset, England


28th March 2025
Portland
boatcare How-To: Check over your sails
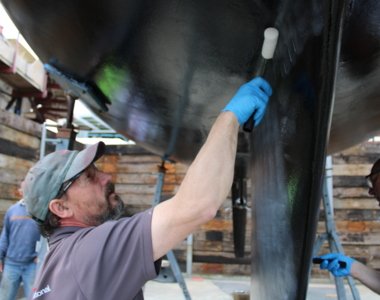
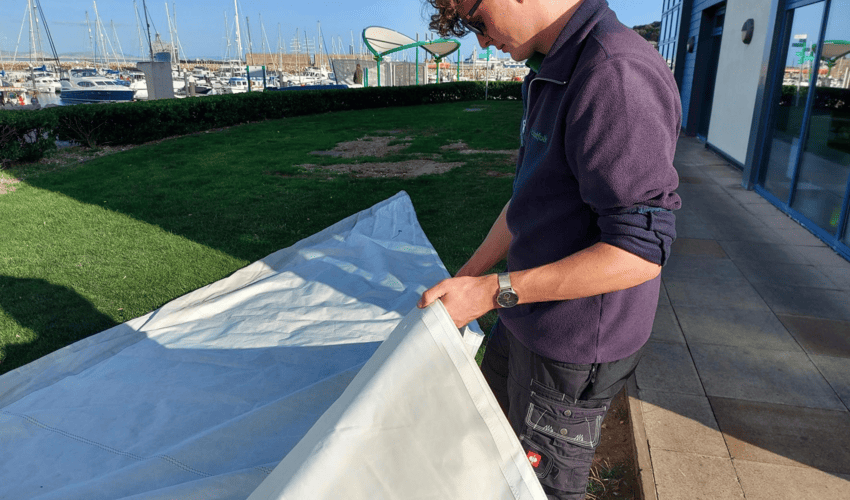
With the start of Spring, you may be starting to think about putting you sails and awnings back up after storing them down below for Winter. Before the Summer season, it is crucial to give everything a once over to check for any damage caused last season or whilst in storage. Getting any minor repairs done now means you can hoist your sails and get out sailing rather than joining the queue for the sailmakers along with everyone else!
Checking over your sails is super easy and even replacing small areas of broken stitching and doing small repairs is perfectly doable with a standard sail repair kit; all you need is a leather palm, sailmakers needle, waxed thread and, for repairs, some sail repair tape, sticky-back dacron or sail cloth and double sided sticky tape.
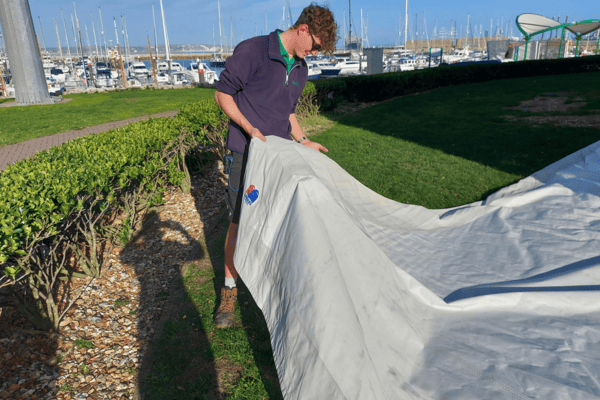
Firstly, choose a calm, dry day and lay your sail out in as much space as you can. It doesn't have to be fully pulled out, but you should be able to stretch the foot of the sail out.
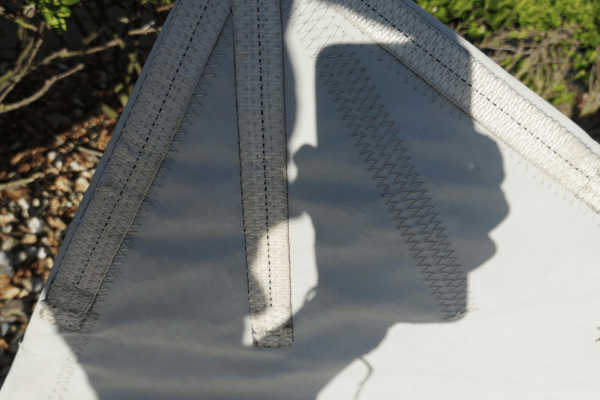
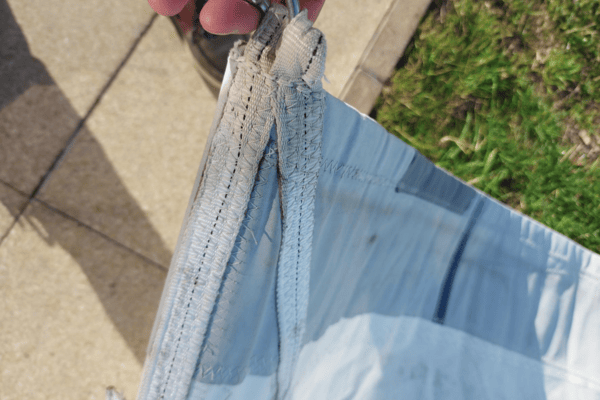
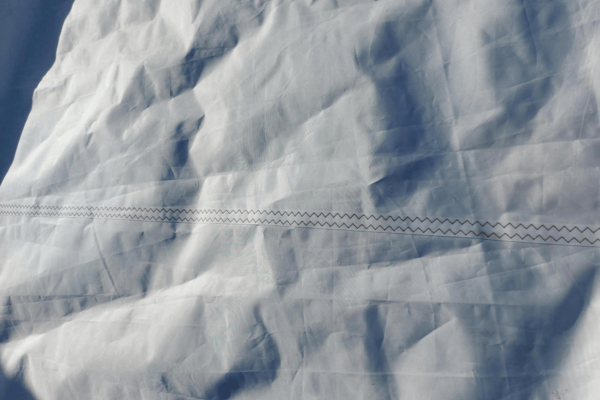
Next, work your way around the perimeter of the sail, along the foot, leech and luff checking for broken stitching and chafe points/small tears in the UV strip and along the luff tape or bolt rope, make sure you check both sides! A split in the sail cloth might be hidden by the UV strip. At each corner, check the webbing straps and loops for wear and broken stitching, you don't want those parting ways when under sail! Also check the top and bottom of the luff where the luff tape goes into the track. Splits in the tape and fluffy ends here can make it difficult to pull the sail up and down the groove and cause it to jam. Also look over the clew, tack and head for loose hardware or rivets on leech line cleats etc...

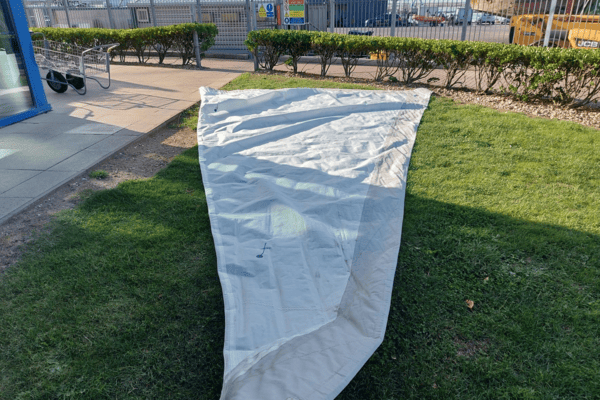
Once you've done the outside edges and corners of the sail, check the seams and panels.
Broken stitching - For small areas, use a heavy duty needle and light waxed thread (aim for the same weight as is used on the sail) to retrace the stitching using the existing holes. Make sure you follow the same zig zag or triple stitch pattern so as not to pull the sail cloth or fabric and create a tension point which may tear when under load. If you have large areas of broken stitching, it's probably best to take it to the sailmaker so that they can use a sewing machine which can cope with the weight of the sail cloth.
Chafe points - Identify specific wear points where the sail rubs on guard wires, spreaders and shrouds. If the sail cloth or UV strip hasn't yet worn through, these can be protected with sticky-back dacron or extra canvas and hand-sewn (where needed) along the existing stitching.
Small repairs - Where the sail cloth has split or chafed through, you may be able to temporarily repair it or stop it getting any worse before taking it to the sail makers using sticky-back dacron, sail repair tape or a piece of sail cloth and double-sided sticky tape to hold it place. This can be stitched round the perimeter (not required for repair tape or sticky-back dacron), to hold it in place using a zig zag stitch, but remember that any holes you make may reduce the integrity of the sail cloth and if in doubt, pop it into your local sailmaker for a professional repair.
Main sails can be checked in exactly the same way, there are just more potential areas for wear and tear to occur such as along batten pockets and you'll also need to check the batten ends (inner and outer) to make sure the fittings are still holding the batten securely, as well as reefing points. Covers are the same, check it all over, give it a wash and repair any stitching or worn areas!
Spinnakers are easier to repair at home for small tears and holes as the cloth is lighter which domestic sewing machines can cope with, but checking them uses a different technique which we'll cover in another post.
Your local sailmaker will likely offer a laundry and valeting service and may also provide storage options if you don't have space or a suitable area so contact them for more details. The local lofts to Portland Marina are Moatt Sails and MM Sail Solutions.